13minpaydayloans.com 13minpaydayloans.com

Archive for the ‘Walls’ Category

Fore dome

Monday, February 20th, 2012

I pulled the front dome out of the basement disrupting the spider festival going on down there.  It cleaned up nice.

Dome = molded plastic piece that fits inside the endcap.  What do you officially call the inner skin of the endcap?

image

1. Top view of front dome

image

2. The area it goes in over the window

image

3. Front view of front dome with opening for the console and storage underneath.

And to answer a question I got about the control console… It actually only controls it’s own back light and the water pump. Otherwise, it’s a tank and battery monitor.  I have a Trimetric battery meter set up with the converter and ran power from the converter  to the water pump forgetting it originally came from the console. I don’t have sensors on the new gray tank, so all I need is the fresh water and black tank connected.  The wires are run and sensors connected at the tanks.

Mobile blogging and more pics

Sunday, February 5th, 2012

I don’t know why I didn’t do this before – install the WordPress Mobile app.  I’m sitting in Rosie swyping this entry and uploading photos.  Maybe I’ll post more frequently with it, or maybe not.

I’m proud of the neatly organized wires running along the ceiling.

2012-02-05_13-13-28_999.jpg

And the spaghetti monster is once again under control after putting in the middle wall near the converter in the back.

2012-02-05_16-20-40_638.jpg


The other side

Sunday, January 1st, 2012

The skin on my fingers was not looking forward to cutting the 13′ long stretch of lower inner skin on the road side that needed to be trimmed around the new wheel well cover.  I made another template, but was more aggressive than when I cut the curb side skin as it will be under the twin bed and not exposed.  I got lucky and only made one major cut and one small trim.  No bleeding blisters and it doesn’t look too bad!

2012-01-08_13-54-54_771.jpg

Having this skin in encouraged me to install some of the smaller pieces.  The front is coming along nicely.

2012-01-08_13-53-46_172.jpg

I’ll post more pics as I move forward on the skins.  I should thank my big brother, Wayne, for letting me borrow his powerful power washer over the fall.  It worked really well on the vinyl-clad aluminum interior skins.  I like these skins.

I really want to install a dead-bolt and have some questions out about what model.  I’m also investigating new 12V receptacles and camera wire options.  And speaking of wire, I forgot to run the tank monitoring wires and need to decide on the stereo speaker locations.  I should take a photo of the wires running along the ceiling next time I venture out  with the camera.


Trimming the edges

Wednesday, September 14th, 2011

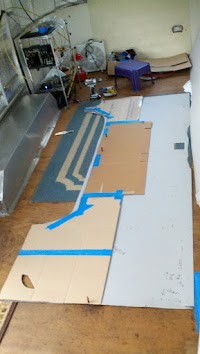
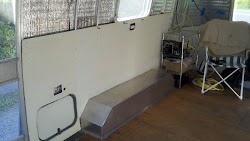
2011-09-12_19-04-29_108.jpg When Frank reunited the new floor with the shell last year, he made new aluminum wheel well covers. A very nice addition, but it meant having to re-cut the inner skins so it fit over the new covers. I was nervous about messing up the skin (you can’t put it back and it doesn’t grow out), so I used cardboard to create a guide for cutting the aluminum skin.  The template got me started in the right direction, but I still had to make several passes and dry fits before it was acceptable.  I think it came out pretty well, the bleeding blisters on my fingers from the tin snips are healing.

2011-09-18_16-39-47_168.jpg

So if March comes in like a lion will it go out like a lamb?

Sunday, March 13th, 2011

Between work and frigid temperatures, I did not get much done in Rosie in January and February.  I’ve made a bit of progress lately.  I listened to the last episode (#132) of the The VAP, while they talked about insulaton, I was cutting and glueing insulation.  It’s been slow going, but I’m still happy with the results and am more than three-fourths done.

IMG_0655.JPG


It’s a bit nippy out there.

Sunday, December 5th, 2010

It was 26 degrees outside today, inside the trailer it topped off at 42 degrees.  The heater helps, but I will be happier when it is insulated.

2010-12-05_14-54-35_44.jpg

You can see the foam strips on the wall in the section above the window and the ones I pre-cut in the bag. The Prodex comes in a big roll.


Since the last post I sealed 3/4ths of the interior seams with Sikaflex 221, bought colored 12 gauge wire to redo the exterior lighting, and started the Prodex insulation process.  When I bought the “Liquid Nails” tube to attach the foam strips that the reflective insulation gets attached to, the guy at the box store told me to be careful with that, quite emphatically.  At the time I thought this stuff must be strong, then I thought, “What does he think I’m going to do with it? Glue some of my body parts together?”  As it turns out, it comes off of hands and out of hair very easily, but still works well (so far).  It’s going to take me all winter at the rate it’s going up.


Summer breeze makes me feel fine

Friday, August 20th, 2010

It’s been great being off work this week.  It’s been warm and sunny, but with cool sleeping weather.  I haven’t gotten as much done as I had hoped.  It seemed that every job required a missing tool or supply or my back wouldn’t hold up.  So I have several started, unfinished jobs.

  • I documented and ripped out the wires for the four main 12 volt circuits.  I’m still trying to sort out the monitoring/console wires.
  • Scraped and scrubbed the inside of exterior walls in the back third of the trailer, removing residual pink and broken wire holders in preparation for reflective insulation installation.
  • Jig sawed 4 feet of insulation foam board into 1 inch strips (Thanks for the loan on the jig saw Marc).
  • Removed and replaced the rubber seal on the back window and did a test run of reflective film on the glass.  Having trouble getting the window back on the trailer.  We need a third person to push in the lip or more finesse on the angle.
  • Prepped and sealed two thirds of the exterior seams and lights with Acryl-R (Thanks for info Frank!).  The other third is prepped.

Left to do before I start insulating:

  • Four new window latch replacements and the fuzzy weather stripping for the window screens arrived, need to take them back off and apply that.
  • Finish removing wires, cleaning up inside of exterior walls, sealing seams, attach window.
  • Seal the interior seams with automotive undercoating or Sikaflex® 221?
  • Leak test

Fred watching me strip the back window.

I started on the top to practice sealing the seams as Frank suggested, but I didn’t get much better by the time I moved down.

Jade would like to thank Frank for putting on the new axles and making the trailer high enough that she can hang out under it now while I work.


Copyright © 2024 Get Out the Map. All Rights Reserved.
No computers were harmed in the 0.501 seconds it took to produce this page.

Designed/Developed by Lloyd Armbrust & hot, fresh, coffee.


Rss Feed Tweeter button Facebook button Technorati button Reddit button Myspace button Linkedin button Webonews button Delicious button Digg button Flickr button Stumbleupon button Newsvine button Youtube button