Author: elly

  • Looking forward to a bucking good time

    Frank sent me the pro-offered aluminum piece to cover the over-sized poorly done air conditioner hole and  old rivet holes.  He kindly pre-drilled the rivet holes and pre-cut the standard 14 inch hole.   Thanks Frank!
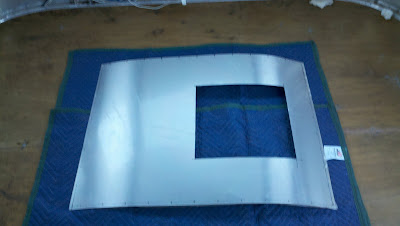
    I prepped the trailer roof (cleaned again, ragged pieces cut or bent down) and gathered my supplies/tools for this project

    • rivet gun, bee hive spring, and machine tool tester from Avery Tools
    • modified 1/8-5/32 rivet set, 5/32 aluminum rivets and black clecos from VTS
    • Sikaflex 721  sealant from Airstream
    • my handy dandy Makita portable drill and a #20 drill bit
    • air compressor (15o psi 6 gallon pancake)
    • clamps for securing the aluminum sheet (and test pieces)

    Since I have never bucked solid rivets before, I decided to practice some before marring Rosie or Frank’s piece.  I drilled some holes in 2 layers of aluminum flashing  and put some  clecos in to hold them together.  The trailer roof and new aluminum roof piece are thicker than the flashing pieces, but still good for practice.  I did a few on my own, then had Craig do the bucking while I did the gun two handed and by-golly, the last couple didn’t turn out half bad.  I started out with the psi at 90 and that was too high even though recommended for that gun and rivet size, 75-80 psi seemed better.

    Tomorrow I’ll drill the rivet holes in Rosie’s roof using Frank’s piece as a template, securing with clecos as I go so the holes stay true. Then I’ll put sealant down and get Craig to help me buck the rivets.  Robin, if you’re out there, keep you fingers crossed from me.

  • AC is off!

    Taking off the compressor and coils made the AC light enough for Craig and I to get it off ourselves today.  I was very happy to see it on the ground.

    IMG_2445.JPG


    The view of the yard from the top of the trailer!

    IMG_2450.JPG


    IMG_2432.jpg

  • Air conditioner saga

    Yes, I’m still trying to fix leaks.  I know of several around the vents and the olympic rivets securing the air conditioner.  So I took a slide down a slippery slope…

    Instead of trying to seal the vents, I decided last weekend to go ahead and replace them with fantastic fans since that was in the plans anyway.  And I would just get rid of the air conditioner and replace it with a sky light for now.  Unfortunately, the AC installer did a horrible job cutting out the hole.  I don’t think I can use a standard 14 inch sky light on this, check out the edges of the aluminum cuts.  Will do more research on options.

    2010-09-18_12-03-10_727.jpg


    For some reason, I started on the air conditioner first.  I read the air forums and blogs and watched some videos on removing the air conditioner.  First off, the DIY guy had a nice mini-bulldozer bucket to work from and didn’t try doing this hanging off a ladder.  Secondly, most folks said they got it off in an afternoon.  Being a “girl”, I hate to admit when I can’t do something or do it well, but I will confess to just spending yet a third day working on getting this blasted thing off.

     2010-09-18_12-04-24_240.jpg

    The shroud was already cracked so I didn’t worry about getting it off intact.  I drilled out the belt rivets, then the rivets holding the top on.  I found gobs, and I mean gobs of old hard caulk.

    2010-09-18_12-50-38_833.jpg


    It took me all afternoon to get through the caulk to find the olympic rivets.  Removing those turned out to be the easy part.  A couple people said that you can just slide a scraper under edges to loosen the air conditioner.  HA!  It was grey caulk, but felt like cement.  I used the scraper, plastic knife, heat gun, mineral spirits, acetone, vice grips, screw driver, and a hammer.  Just before supper, the temperature dropped quickly, the wind picked up and dark clouds rolled in as I finally got the AC released from it’s bondage.  Tomorrow I’ll see if I can talk Craig into helping me get it off the trailer or continue to dismantle it piece by piece.

    I read somewhere that C’World would only install an AC if you took off the old one yourself.  I can see why.

  • Cleanup and camping

    I camped in the trailer at Robert H. Treman State Park with a couple other trailer folks this weekend.  Robin, Mark, and I took a field trip to Fletch’s and then spent a quiet afternoon hanging out with Robin and mom.  On Sunday, the crew took a hike up the gorge to the upper falls. There was a nice campfire thanks to Mick.  It was such a joy to talk trailers with kindred souls.

    I was waiting for Mark's photos since his are so wonderful, but I'll post my crappy one for now.

    Last weekend, I finished cleaning off the inside of the exterior walls.  I also finished sorting out the wires so now the only ones running across the ceiling are the exterior lights.  The 12 volt is all removed and the gauge wires are all wrapped up in a bag.  I feel badly that I did not do this before taking it down to Frank, he should not have had to fight with my tangled mess.

    I sealed up the front window and I’m still working on the window gaskets for the side windows and adding the fuzzy weatherstripping to the screens as I go.

  • Rosie Returns!

    I picked up Mom in Endicott late yesterday afternoon and we drove down and stayed over night in Hunt Valley.  This morning we drove over and met Frank to pick up Rosie. It was great to talk with Frank and get the tour in person:  new plywood floor, axles, and belly pan; re-welded, POR’d, and painted frame; fabricated wheel wells, new hot water heater, and more.  He did a great job and is a great guy to work with!

    Frank took pics of Rosie leaving – click pic for his post

    It was a grey, rainy, and foggy ride home, but she towed straight and easy. With the old axles, I felt like I was towing a sled. She rides MUCH higher and feels very solid. Welcome home pics:

  • Bash, bang, boom

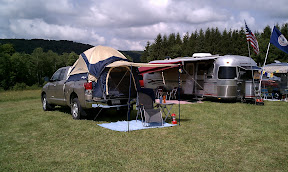
    Had a great time at the Birthday Bash in Plymouth, NY at the home of Rob Baker last weekend.  Thanks to Rob&Zoey, Frank&Beth, Steve, Ace, Deborah, Ansty&Grant, Michael, and all the other folks who helped make this a wonderful event.  I didn’t mind being in my truck tent, but hopefully the next time I go camping, it will be with Rosie (see latest post from Frank).  I really enjoyed seeing old friends and making new ones, some two legged, some four.   I met people I had been following on AirForums and got lots of good ideas wandering into people’s trailers.  Craig, Sue, Mom, K&N came for the open house and seemed to contract the Airstream bug.  Sitting in the field Saturday night, watching the fireworks, then listening to Antsy and Michael was a most memorable time  (Rob’s Bash post with links to pictures).

    Even though Rosie is not ready to leave Frank camp yet, the majority of work is completed and she will return soon (no date set).  So I ordered the reflective insulation (Prodex) and have been designing the new electric system with the idea of solar in the future when my budget recovers in a year or two.  For now, I’ll be thrilled to have a replacement for the old Univolt inverter and looking at using my gift certificate from Cay at Vintage Trailer Supply for a new converter/charger.  Before I do either of those things, I need to be sure Rosie is as water tight as possible, need to talk to Frank about leaks and seam sealers next time we connect.

  • Fiberglass Shower Seat Repair

    Unfortunately, when I cleaned the bathroom ABS plastic fixtures with Retrobright (see previous post) and left them out in the sun to catch the ultraviolet rays, the wind picked up.  It blew the shower seat off the picnic table and it landed on the bend in the back and created a 2 x .25 inch crevice and a crack extending another 2-3 inches along the ridge.  I thought about having this fixed professionally and also looked around to see how hard it is to find a rear bathroom 1973 Safari shower seat — too expensive to have fixed and no obvious source for a replacement.  I wanted to learn how to do fiberglass, right? (stinky chemicals)

    So here are some photos of my amateur attempt at fixing the shower seat.  The last shot shows it with a light coat of spray primer (painting later).  It’s not professional, but as my dad used to say “A blind man on a galloping horse won’t see it” or as Krusty the clown says “It’s not just good, it’s good enough.”  It just hit me, those two were a lot a like 😉

    I received the Tubby USA DIY paint kit (Light Almond) yesterday to do the sink and now the tub seat.  I’ll put up pictures after I paint these pieces.